Working for the d-shop, first in the Silicon Valley and now in Toronto, allows me to use my creativity and grab any new gadget that hits the market.
This time, it was Oculus Go’s turn 😉 and what’s the Oculus Go? Well, it is an Standalone VR headset, which basically means…no tangled cables 😉
For this project I had the chance to work with either Unity or Unreal Engine…I had used Unity many times to develop Oculus Rift and Microsoft HoloLens applications…so I thought Unreal Engine would be a better choice this time…although I have never used it in a big project before…specially because nothing beats Unreal when it comes to graphics…
With Unreal chosen…I needed to make another decision…C++ or Blueprints…well…while I have used C++ in the past for a couple of Cinder applications…Blueprints looked better as I wanted to develop faster and without too many complications…and well…that’s half of the truth…sometimes Blueprints can become really messy 😊
Just so you know, I used Unreal Engine 4.20.2 and created a Blueprints application.
Since the beginning I knew that I
wanted to use SAP Leonardo Machine Learning API’s…as I used them before for my
blog “Cozmo, read to me” where I used a Cozmo Robot, OpenCV and SAP Leonardo’s OCR API to read a
whiteboard with a handwritten message and have Cozmo read it out loud.
The idea
This time, I wanted to showcase more than just one API…so I needed to choose which ones…gladly that wasn’t really hard…most API are more “Enterprise” oriented…so that left me with “Image Classification, OCR and Language Translation” …
With all decided…I still needed to figure out how to use those API’s…I mean…Oculus Go is Virtual Reality…so no chance of looking at something, taking a picture and send it to the API…
So, I thought…why don’t I use Blender (which is an Open-Source 3D computer graphics software toolset) and make some models…then I can render those models…take a picture and send it to the API…and having models means…I could turn them into “.fbx” files and load them into Unreal for a nicer experience…
With the OCR and Language Translation API’s…it was different…as I needed images with text…so I decided to use InkScape (which is an Open-Source Vector Graphics Editor).
The implementation
When I first started working on the project…I knew I needed to start step by step…so I first did a Windows version of the App…then ported it to Android (Which was pretty easy BTW) and finally ported it to Oculus Go (Which was kind of painful…)
So, sadly I’m not going to be able to put any source code here…simply because I used Blueprints…and I’m not sure if you would like to reproduce them by hand ☹ You will see what I mean later on this blog…
Anyway…let’s keep going 😊
When I thought about this project, the first thing that came into my mind was…I want to have a d-shop room…with some desks…a sign for each API…some lights would be nice as well…
So, doesn’t look that bad, huh?
Next, I wanted to work on the “Image Classification” API…so I wanted to be fairly similar…but with only one desk in the middle…which later turned into a pedestal…with the 3D objects rotating on top of it…the it should be a space ready to show the results back from the API…also…arrows to let the user change the 3D model…and a house icon to allow the user to go back to the “Showfloor”…
You will notice two things right away…first…what does that ball supposed to be? Well…that’s just a placeholder that will be replaced by the 3D Models 😊 Also…you can see a black poster that says “SAP Leonardo Output”…that’s hidden and only become available when we launch the application…
For the “Optical Character Recognition” and “Language Translation” scenes…it’s pretty much the same although the last one doesn't have arrows 😊
The problems
So that’s pretty much how the scenes are related…but of course…I hit the first issue fast…how to call the API’s using Blueprints? I looked online and most of the plugins are paid ones…but gladly I found a free one that really surprised me…UnrealJSONQuery works like a charm is not that hard to use…but of course…I needed to change a couple of things in the source code (like adding the header for the key and changing the parameter to upload files). Then I simply recompiled it and voila! I got JSON on my application 😉
But you want to know what I changed, right? Sure thing 😊 I simply unzip the file and went to JSONQuery --> Source --> JSONQuery --> Private and opened JsonFieldData.cpp
Here I added a new header with (“APIKey”, “MySAPLeonardoAPIKey”) and then I looked for PostRequestWithFile and change the “file” parameter to “files”…
To compile the source code, I simply created a create a new C++ project, then a “plugins” folder in the root folder of my project and put everything from the downloaded folder…open the project…let it compiled and then I re-created everything from my previous project…once that was done…everything started to work perfectly…
So, let’s see part of the Blueprint used to call the API…
Basically, we need to create the JSON, call the API and then read the result and extract the information.
Everything was going fine and dandy…until I realized that I needed to package the 3D images generated by Blender…I had no idea how to do it…so gladly…the Victory Plugin came to the rescue 😉 Victory has some nodes that allows you to read many directories from inside the generated application…so I was all set 😊
This is how the Victory plugin looks like when using it in a Blueprint…
The Models
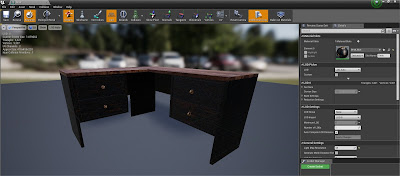
For the 3D Models as I said…I used Blender…I modeled them using “Cycles Render”, baked the materials and then render the image using “Blender Render” to be able to generate the .fbx files…
If the apples look kind of metallic or wax like…blame my poor lighting skills ☹
When loaded into Unreal…the models look really nice…
Now…I know you want to see how a full Blueprint screen looks like…this one is for the 3D Models on the Image Classification scene…
Complicated? Well...kind of…usually Blueprints are like that…but they are pretty powerful…
Here’s another one…this time for the “Right Arrow” which allows us to change models…
Looks weird…but works just fine 😉
You may realize that both “Image Classification” and “OCR” both have Right and Left arrows…so I needed to do some reuse of variables and they needed to be shared between Blueprints…so…for that I created a “Game Instance” where I simply create a bunch of public variables that could be then shared and updated.
If you wonder what I used Inkscape for? Well…I wanted to have a kind of Neon Sign image and a handwritten image…
From Android to Oculus Go
You may wonder…why does it changed from Android to the Oculus Go? Aren’t they both Android based? Well…yes…but still…thanks to personal experience…I know that things change a lot…
First…on Android…I created the scenes…and everything was fine…on the Oculus Go…no new scenes were loaded…when I clicked on a sign…the first level loaded itself… ☹ Why? Because I needed to include them in the arrays of scenes to be packaged…
And the funny thing is that the default projects folder for Unreal is “Documents”…so when I tried to add the scene it complained because the path was too long…so I need to clone the project and move it a folder on C:\
Also…when switching from Windows to Android…it was a simple as changing the “Click” to “Touch”…but for Oculus Go…well…I needed to create a “Pawn”…where I put a camera, a motion controller, and a pointer (acting like a laser pointer)…here I switch the “Touch” for a “Motion Controller Thumbstick”…and then from here I needed to control all the navigation details…very tricky…
Another thing that changed completely was the “SAP Leonardo Output”…let’s see how that looked on Android…
Here you can see that I used a “HUD”…so wherever you look…the HUD will go with you…
On the Oculus Go…this didn’t happen at all…first I needed to put a black image as a background…
Then I needed to create an actor and then put the HUD inside…turning it on a 3D HUD…
The final product
When everything was done…I simply packaged my app and load it into the Oculus Go…and by using Vysor I was able to record a simple session so you can see how this looks in real life 😉 Of course…the downside (Because first…I’m lazy to keep figuring out things and second because it’s too much hassle) is that you need to run this from the “Unknown Sources” section on the Oculus Go…but…it’s there and working and that’s all that matters 😉
Here’s the video so you can fully grasp what this application is all about 😊
I hope you like it 😉
Greetings,
Blag.
SAP Labs Network.


