miércoles, 9 de septiembre de 2015

Amazon Alexa and SAP HANA

This post was originally posted on Amazon Alexa and SAP HANA.


If you are an SAP Employee, please follow us on Jam.


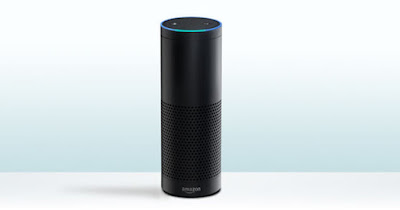
Amazon Alexa (Formerly Amazon Echo) is an awesome technology that allows you to give voice commands and get cool answers. Yes…it’s like Siri but from Amazon. Also, it doesn’t live on your cellphone, as Alexa is black cylinder packed up with seven microphones and very loud speakers.


We just get one for the d-shop almost a week ago…so of course…I needed to hack it and make it work with SAP HANA -;)

First, we need to create a Calculation View and call it “FLIGHTS_BY_CARRIER”. It will be composed of two tables, SCARR and SFLIGHT.

First, we need to create a Join object and link the table by MANDT and CARRID. From here select the following fields as output MANDT, CARRID, CARRNAME, PRICE and CURRENCY.

Then create an Aggregation object selecting the fields CARRNAME, PRICE (As Aggregated Column) and CURRENCY. Filter the CURRENCY field by ‘USD’.

Then create a Projection object and select only PRICE and CARRNAME.

On the Semantics object make sure to select “CROSS CLIENT” as the Default Client.

Now, switch to the SAP HANA Development View and create a new repository. Call it “Flights”.

Create a new “XS Engine” project and call it “Flights” as well. Link it to the “Flights” repository.

Create an empty “.xsapp” file.

Create a file called “.xsaccess” with the following code.

.xsaccess
{
          "exposed" : true,
          "authentication" : [ { "method" : "Basic" } ]
}

Finally create a file called “flights.xsodata” with the following code

Flights.xodata
service {
          "Blag/FLIGHTS_BY_CARRIER.calculationview" as "FLIGHTS" keys 
                                                        generate local "Id";
}

Activate your project and launch it on your browser, you should see something like this…


The SAP HANA part is done…so we can move into the Amazon Alexa part…

I need to thank this blog post Alexa Skills Tutorial: The Definitive Guide to Coding for the Amazon Echo as it really helped me to write my own blog post -;)

In order to code for Amazon Alexa, we can use a new and awesome service from Amazon called Amazon Lambda…which basically allows you to define a NodeJS service that will run only when you need it to run…and also allows you to use the first million requests per month for free…

First…log into your Amazon Web Services Account and get into Amazon Lambda. Make sure you are on the North Virginia region…otherwise this will not work…

Once in there…create a new lambda function and select alexa-skills-kit-color-expert


Then, select the “Alexa Skills Kit” Event Source Type…


Then, we need to configure our function…meaning, we need to name it…


Leave the code entry type for later and choose a role…


Choose Basic execution role and a pop up will be shown…


Press the “Allow it” button at the bottom. Continue and finally press the “Create Function” button. A ARN number will be generated for your function, take note of it as we will need it on the next step.

Now, we need to go to http://developer.amazon.com and log in.

Choose Apps & Services --> Alexa --> Alexa Skills Set.


Press the “Add New Skill” button and enter the Name, Invocation Name (How are we going to call it from Alexa), version and the Endpoint (In this case, the ARN number from our Lambda Function)…


When we click on next, an Application Id number will be generated. Take note of it as we will need it on the coding part…

The Interaction Model section is very important as here we’re going to define the “Intent Schema” and “Sample Utterances”…the first will define the parameters that we’re going to send to Alexa and the second is how we are going to call our application.

Intent Schema
{
  "intents": [
    {
      "intent": "GetSAPHANAIntent",
      "slots": [
        {
          "name": "airline",
          "type": "LITERAL"
        }
      ]
    },
    {
      "intent": "HelpIntent",
      "slots": []
    }
  ]
}

Our variable is going to be called “airline” and it’s going to be a LITERAL…other types are NUMBER, DATE, TIME and DURATION. The intent is the method that we’re going to call in our code…


Sample Utterances
GetSAPHANAIntent get total amount for airline {American Airlines|airline}
GetSAPHANAIntent get total amount for airline {United Airlines|airline}
GetSAPHANAIntent get total amount for airline {Delta Airlines|airline}
GetSAPHANAIntent get total amount for airline {Lufthansa Airlines|airline}
GetSAPHANAIntent get amount for {Delta Airlines|airline}
GetSAPHANAIntent get amount for {Lufthansa|airline}
GetSAPHANAIntent get amount for {United Airlines|airline}
GetSAPHANAIntent get amount for {American Airlines|airline}
GetSAPHANAIntent get {United Airlines|airline}
GetSAPHANAIntent get {Lufthansa|airline}
GetSAPHANAIntent get {Delta Airlines|airline}
GetSAPHANAIntent get {American Airlines|airline}

HelpIntent help
HelpIntent help me
HelpIntent what can I ask you
HelpIntent get help
HelpIntent to help
HelpIntent to help me
HelpIntent what commands can I ask
HelpIntent what commands can I say
HelpIntent what can I do
HelpIntent what can I use this for
HelpIntent what questions can I ask
HelpIntent what can you do
HelpIntent what do you do
HelpIntent how do I use you
HelpIntent how can I use you
HelpIntent what can you tell me
HelpIntent how do i get an amount

The Test section is where we can test our application by sending a utterance like “get American Airlines”…we need to create our function code before we can test it…so don’t worry about this for now…


Forget about the Publishing Information section unless you really want to publish your application…

Let’s create a folder and call it “Alexa_HANA” or something nice like that…then create a folder called “src”. Copy the code from here and create a file called “AlexaSkills.js”

We’re going to need to install the node-rest-client package on our function, so do the following on a terminal

sudo npm install --prefix=~/Alexa_HANA/src node-rest-client

This will create a folder called “node_modules” with the package in our project folder…then create a file called “index.js” and copy and paste the following code…

index.js
var Client = require('node-rest-client').Client
  , AlexaSkill = require('./AlexaSkill')
  , APP_ID     = 'amzn1.echo-sdk-ams.app.XXX';

var error = function (err, response, body) {
    console.log('ERROR [%s]', err);
};

function toTitleCase(str)
{
    return str.replace(/\w\S*/g, function(txt){return txt.charAt(0).toUpperCase() + txt.substr(1).toLowerCase();});
}

var getJsonFromHANA = function(airline, callback){
 var sAirline = toTitleCase(airline);
 var options_auth={user:"SYSTEM",password:"YourPassword"};
 client = new Client(options_auth);
 client.get("http://YourServer:8000/Flights/flights.xsodata/FLIGHTS?$format=json&$filter=CARRNAME eq \'" + 
                    sAirline + "\'", function(data, response){
  if (data.d.results[0] != undefined){
   var Amount = data.d.results[0].PRICE; 
  }else{
   var Amount = "Sorry I coudln't find that airline"; 
  }
  callback(Amount);
 }).on('error',function(err){
            callback("Sorry there was a connection error");
       });
}

var handleHANARequest = function(intent, session, response){
  getJsonFromHANA(intent.slots.airline.value, function(data){
 var text = data;
    var cardText = 'Total sales are: ' + text;

    var heading = 'Total sales for: ' + intent.slots.airline.value;
    response.tellWithCard(text, heading, cardText);
  });
};

var HANA = function(){
  AlexaSkill.call(this, APP_ID);
};

HANA.prototype = Object.create(AlexaSkill.prototype);
HANA.prototype.constructor = HANA;

HANA.prototype.eventHandlers.onSessionStarted = function(sessionStartedRequest, session){
  console.log("onSessionStarted requestId: " + sessionStartedRequest.requestId
      + ", sessionId: " + session.sessionId);
};

HANA.prototype.eventHandlers.onLaunch = function(launchRequest, session, response){
  // This is when they launch the skill but don't specify what they want.
  var output = 'Welcome to S A P HANA. ' +
    'Say an Airline Name.';

  var reprompt = 'Which Airline would you like?';

  response.ask(output, reprompt);

  console.log("onLaunch requestId: " + launchRequest.requestId
      + ", sessionId: " + session.sessionId);
};

HANA.prototype.intentHandlers = {
  GetSAPHANAIntent: function(intent, session, response){
    handleHANARequest(intent, session, response);
  },

  HelpIntent: function(intent, session, response){
    var speechOutput = 'Get the total amount for any airline. ' +
      'Which Airline would you like?';
    response.ask(speechOutput);
  }
};

exports.handler = function(event, context) {
    var skill = new HANA();
    skill.execute(event, context);
};

Once is done, we will need to .zip the files…so go into your “src” folder and create a .zip file that include the “node_modules” folder, the AlexaSkills.js file and the index.js file…you can call the .zip file “SAPHANA.zip”.

Now, go back to your Amazon Lambda function and choose the Code tab. Then choose “Upload a .ZIP file” and press Upload. Choose your SAPHANA.zip file and then press the “Save” button.


With that…we should be ready to keep going -;)

We can now use the Test section of our Alexa Skill…


Once you know it’s working…you can test your function in your Amazon Alexa by saying…

“Alexa ask get hana”

And then “get American Airlines” or “get total amount for Delta Airlines”

Here’s a video to show you how it works -:)


As you can see…it’s actually pretty easy but there’s something you need to keep in mind…Alexa will not be able to recognize everything you say…so you need to be careful with your utterances…also…in SAP HANA we have “American Airlines” but Alexa will understand “american airlines”…that’s why I needed to capitalize the first letter as otherwise, both are different airline names -;)

Greetings,

Blag.
Development Culture.

Firing Up (BeagleBone Black, WebCam, Missile Launcher and OpenCV)

This post was originally posted on Firing Up (BeagleBone Black, WebCam, Missile Launcher and OpenCV).


If you are an SAP Employee, please follow us on Jam.

My good friend John Astill came to visit us at d-shop some time ago…and he saw the Thunder Missile Launcher that I bought as a Christmas present for my team dinner. He told me…”Blag…you should build that app that fires up missiles when you put a color or object in front of the camera”…that got me thinking of course -;)

So John…this blog is for you 

So, let’s start…

You will need OpenCV installed…so the regular way should work…

sudo apt-get install opencv

And OpenCV should be installed and ready to use now…

Next…I needed to hack the Missile Launcher in order to be able to make it fire…so this is where the fun begins…I hooked the Missile Launcher to my Linux box on VMWare and made a lsusb -vv command to get the information about the USB device…


Here we can see that the IdVendor is 0x2123 and the idProduct is 0x1010. This doesn’t really give us anything as we don’t know to pass the information we need in order to make it work…so next step was to sniff the device in order to get the USB commands…I did this using SnoopyPro a USB Sniffer Tools for Windows…and just notice that I couldn’t make it work properly on Windows 7, so I need to use my old and nice Windows XP VMWare Image…and install the Dream Cheeky software...


Once we have SnoopyPro running, need to connect the Missile Launcher and click on File --> Unpack Drivers…


Next, we need to look for the correct IdVendor and IdProduct and right-click to select Install and Restart.


This will allow us to log everything that happens while using the device. By default, at least for the Missile Launcher…it will log 14 lines that don’t matter much to us…but when we hit for example the Up button…then we get more interesting info…


This is basically saying that to make the launcher move up, we need to pass the following…

0x02 0x02 0x00 0x00 0x00 0x00 0x00 0x00

Now…the part that interests us is the Fire action…so let’s explore it…


This one is

0x02 0x10 0x00 0x00 0x00 0x00 0x00 0x00

Cool…now we’re getting closer…but…there’s a piece that it’s missing…how do we send this command? Easy…just take a look at the Transfer command…


This command tells us that we need to pass the information like this…

0x21 0x09 0 0

Followed by the action we want to perform…

In order to use the device on our BeagleBone…we need to install something first…

pip install pysub

This library will allow us to connect and more important, send commands to our device.

As we’re going to use a Camera and the Missile Launcher both at the same time…we need a USB Hub that it’s powered…otherwise, it will never work…I got this one from Amazon.

So…power up the USB Hub and connect both WebCam and Missile Launcher, connect the Hub to your BeagleBone Black and then connect the BeagleBone to your laptop…

Use Nano or any other editor of your choice and create a file called Thunder.py

Thunder.py
import cv2
import numpy as np
import usb.core

cam = cv2.VideoCapture(-1)
cam.set(3, 960)
cam.set(4,720)
s, img = cam.read()

dev = usb.core.find(idVendor=0x2123,idProduct=0x1010)
try:
            dev.detach_kernel_driver(0)
except Exception, e:
            pass

winName = "Thunder"
cv2.namedWindow(winName, cv2.CV_WINDOW_AUTOSIZE)
while s:
        s, img = cam.read()
        key = cv2.waitKey(10)
        if key == 27:
                cv.destroyWindow(winName)
                break
        hsv = cv2.cvtColor(img, cv2.COLOR_BGR2HSV)
              lower_green = np.array([38, 100, 50])
              upper_green = np.array([75, 255, 255])

        mask = cv2.inRange(hsv, lower_green, upper_green)
        res = cv2.bitwise_and(img,img, mask=mask)
        cv2.imshow(winName, res)

        if cv2.countNonZero(mask) > 61000:
                dev.ctrl_transfer(0x21, 0x09, 0, 0,
                                  [0x02, 0x010, 0x00, 0x00, 0x00, 0x00, 0x00, 0x00])


This code will basically open up the camera connection, and turn the display black so only the color that we want to track is shown. In this case, we want to fire up the missile launcher only when we see something “green”. As you can see we’re passing the transfer command as single parameters but the fire command as an array.

Now…the BeagleBone doesn’t have a display…so you could attach a monitor and a keyboard or you could do something more interesting and smart…

We’re going to install Tight VNC Server

sudo apt-get install tightvncserver

The first time you run it, it will ask you for a password for the current user, so go ahead and provide one…

And it will start running…so you will be able to open a Remote Desktop connection to your BeagleBone…now you only need a client to connect to it...

If you’re using Windows you can download the TightVNC Client from here…

http://www.tightvnc.com/download/2.7.10/tightvnc-2.7.10-setup-64bit.msi

http://www.tightvnc.com/download/2.7.10/tightvnc-2.7.10-setup-32bit.msi

If you’re using Linux you can simply download it using apt-get install like this…

sudo apt-get install xtightvncviewer

Run it on the terminal

Just provide the IP for your BeagleBone which should be 192.168.7.2:1 on the small box that will appear, provide the password that you setup for the VNCServer on the next screen and you’re all set…


If you’re using Windows…simply double click the tightvnc-jviewer.jar file and enter the following information…


In order to test this, we need to simply print a nice green box…


Then we can run the app…


And put the green box in front of the camera -;)


Sorry for the flaky picture…but the Missile Launcher was firing off and I had my phone on one hand and the green box paper in the other one -;)

Greetings,

Blag.
Development Culture.

Nest Thermostat and R - Creating a Shiny dashboard

This post was originally posted on Nest Thermostat and R - Creating a Shiny dashboard.


If you are an SAP Employee, please follow us on Jam.

At the d-shop we're always looking forward to play with the latest technologies...a while the Nest Thermostat is not really "new", we're in the process of getting one.

For now, we are happy to be able to play a little bit with Nest Home Simulator available on the Google Chrome Store.

In this blog, we're going to use the Nest Home Simulator, the Statistics Programming Language R and the Shiny package, which allows us to create awesome web interfaces to manage data. Also, we're going to need the RJson package.

First step will be to create an account on the Nest Developer Program and the install the Nest Home Simulator.


Wen we log into the Simulator, we are going to be able to create a Thermostat to start playing around with the current and target temperatures...


The second important thing, is that when we are log into the Nest Developer Program we're going to be able to create a client which will access our thermostat and also, we will going to able to generate a unique number to communicate with it.


We need to just copy and paste the URL from the Authorization URL and after accepting the conditions a number will be presented...we need this number for our R code...but keep in mind that once the connection is closed, we will need to generate a new number...


Now, we're ready to add some code to the mix...when working with R, is always better to use RStudio...so copy and paste this code...and remember to replace the code variable with your own number...also you will need to replace the Client ID and Client Secret with the information from your Nest Developer Program Client code...

Nest_Dashboard.R
library("shiny")
library("rjson")

if(!exists("access_code")){
  code<-"XXX"
  info_data<-data.frame(Humidity=integer(),
  Current_Temperature=integer(),Target_Temperature=integer(),Times=character())
  access_code<-system(sprintf('curl -X POST 
  "https://api.home.nest.com/oauth2/access_token?client_id=XXX&code=%s&
  client_secret=XXX&grant_type=authorization_code"',code),intern=T)
  document<-fromJSON(access_code)
  access<-document$access_token
  devices<-paste("https://developer-api.nest.com/devices?auth=",access,sep="")
  all_devices<-system(sprintf('curl -L -X GET -H "Accept: application/json" "%s"',devices),intern=T)
  device<-gsub("thermostats|:|{|\"|humidity.*","",all_devices,perl=T)
  themostat_code<-paste("https://developer-api.nest.com/devices/thermostats/",device,"?auth=",access,sep="")
}

get_nest_info = function(info_data){
    thermostat<-system(sprintf('curl -L -X GET -H "Accept: application/json" "%s"',themostat_code),intern=T)
    info<-fromJSON(thermostat)
    timeframe<-Sys.time()
    timeframe<-gsub("\\d+-\\d+-\\d+\\s","",timeframe)
    new_data<-data.frame(Humidity=info$humidity,Current_Temperature=info$ambient_temperature_f,
    Target_Temperature=info$target_temperature_f,Times=timeframe,stringsAsFactors = F)
    if(nrow(info_data)==10){
      info_data<-info_data[-1,]
    }
    info_data<-rbind(info_data,new_data)
  return(info_data)
}

runApp(list(
  ui = pageWithSidebar(    
    
    headerPanel("Nest Dashboard"),
    
    sidebarPanel(
    ),
    
    mainPanel(
      plotOutput("nestPlot")
    )
  ),
  server =function(input, output, session) {
    autoInvalidate <- reactiveTimer(10000, session)
      output$nestPlot <- renderPlot({
        autoInvalidate()
        info_data<<-get_nest_info(info_data) 
        plot(info_data$Current_Temperature,type="n",axes=F,ann=F)
        lines(info_data$Current_Temperature,col="blue")
        lines(info_data$Target_Temperature,col="red")
        points(info_data$Current_Temperature, pch=21, bg="lightcyan", cex=1.25)
        points(info_data$Target_Temperature, pch=21, bg="lightcyan", cex=1.25)
        box()
        xy<-length(info_data$Times)
        axis(2, col.axis="blue", las=1)
        axis(1, at=1:xy, lab=info_data$Times, col.axis="purple")
        legend("topright",c("Current Temp","Target Temp"),lty=c(1,1),col=c("blue","red"),bty="n")
    })
  }
))

This code will get 10 readings until it refreshes itself to get 10 new ones. So we can update the Current and Target Temperature values in order to see the Dashboard changing...


Greetings,

Blag.
Development Culture.

lunes, 10 de agosto de 2015

LED is my new Hello World - Mercury Time

This one was a little bit tricky and longer than I expected...it also...forced me to spend a lot of time reading the documentation as there aren't many tutorials or books about Mercury...

Anyway...in the end it's working fine, so I'm quite happy -:)

Mercury has a lot of pretty convenient functions...you just need to find them out -;)

led_numbers.m
:- module led_numbers.
:- interface.
:- import_module io.

:- pred main(io::di, io::uo) is det.

:- implementation.
:- import_module list, string, int, array, char.

:- pred get_leds(list.list(character)::in, list.list(character)::in, 
                 int::in, list.list(string)::out ) is det.
 
get_leds(LDIGITS, LDIGITS_AUX, N, RESPONSE) :-
 (
  LEDS = array([array([" _  ","| | ","|_| "]),
                array(["  ","| ","| "]),
                array([" _  "," _| ","|_  "]),
                array(["_  ","_| ","_| "]),
                array(["    ","|_| ","  | "]),
                array([" _  ","|_  "," _| "]),
                array([" _  ","|_  ","|_| "]),
                array(["_   "," |  "," |  "]),
                array([" _  ","|_| ","|_| "]),
                array([" _  ","|_| "," _| "])
               ]),
  list.length(LDIGITS,LEN),
  ( if LEN > 0 then
   HEAD = det_head(LDIGITS),
   TAIL = det_tail(LDIGITS),
   char.to_int(HEAD, HEAD_I:int),
   HEAD_N:int = HEAD_I - 48,
   LINE = elem(HEAD_N, LEDS),
   SUB_LINE = elem(N, LINE),
   get_leds(TAIL, LDIGITS_AUX, N, RESULT),
   RESPONSE = [SUB_LINE] ++ RESULT
    else if N < 2 then
   get_leds(LDIGITS_AUX, LDIGITS_AUX, N+1, RESULT),
   RESPONSE = ["\n"]  ++ RESULT
    else if N = 2 then
   RESPONSE = ["\n"]
    else
   RESPONSE = [] )
 ). 
 
main(!IO) :-
 io.write_string("Enter a number: ",!IO),
 io.read_line_as_string(Result, !IO),
 ( if
   Result = ok(String),
   NUM = string.strip(String),
   to_char_list(NUM,LDIGITS),
   get_leds(LDIGITS, LDIGITS, 0, RESPONSE)
  then
   io.write_string(string.join_list("", RESPONSE), !IO)
  else
   io.write_string("Not a number...",!IO)
 ).


Anyway...here are the screens -;)


Hope you like it -;)

Greetings,

Blag.
Development Culture.

miércoles, 5 de agosto de 2015

My first post on Mercury

So...my new language for a couple of weeks...is Mercury -:)

You may ask...what is Mercury?

Mercury looks like Prolog, but feels like strict Haskell or pure OCaml.
 In other words is a logical, functional and object-oriented programming language...

As always...I needed to develop an app to learn how to use it...and while it gave me more than one headache...here it is -;)

fibo.m
:- module fibo.
:- interface.
:- import_module io.

:- pred main(io::di, io::uo) is det.

:- implementation.
:- import_module string, int.

:- pred fibo(int::in, int::in, int::in, string::out) is det.

fibo(NUM, A, B, FIBS) :-
 ( 
  if A = 0 
  then fibo(NUM-1,A+B,B,FIB), FIBS = int_to_string(A) ++ " " ++ int_to_string(B) ++ 
                                     " " ++ int_to_string(A+B) ++ " " ++ FIB
  else if A > 0, NUM > 1
  then fibo(NUM-1,A+B,A,FIB), FIBS = int_to_string(A+B) ++ " " ++ FIB
  else FIBS = ""
 ).
 
main(!IO) :-
 io.write_string("Enter a number: ",!IO),
 io.read_line_as_string(Result, !IO),
 ( if
   Result = ok(String),
   string.to_int(string.strip(String), N)
  then
   fibo(N,0,1,FIBS),
   io.write_string(FIBS,!IO)
  else
   io.write_string("Not a number...",!IO)
 ).

The cool thing about Mercury is that it forces you to not allow your app to fail...as the "else" is mandatory...if you enter a number then it's fine...but if you enter a letter, you are forced to do something...

Here are the pics...


 Now...I just need to break my head a little bit more trying to make my LED_Numbers app -:D

Greetings,

Blag.
Development Culture.

viernes, 31 de julio de 2015

LED is my new Hello World - Zonnon Time

You knew this was coming...don't you? -;)

So here...I took another approach because Zonnon doesn't have a built-in split command...and also because I'm not sure how to create an array of arrays and because I couldn't make my procedure return an array and then assign it to another array -:(

Still...I'm quite happy with the result -:D

LED_Numbers.znn
module LED_Numbers;

var num, text, concat:string;
var leds:array 10 of string;
var led:array 3 of string;
var i, j, z, len, lenled:integer; 

begin
 leds[0]:=" _  ,| | ,|_| ,";
 leds[1]:="  ,| ,| ,";
 leds[2]:=" _  , _| ,|_  ,";
 leds[3]:="_  ,_| ,_| ,";
 leds[4]:="    ,|_| ,  | ,";
 leds[5]:=" _  ,|_  , _| ,";
 leds[6]:=" _  ,|_  ,|_| ,";
 leds[7]:="_   , |  , |  ,";
 leds[8]:=" _  ,|_| ,|_| ,";
 leds[9]:=" _  ,|_| , _| ,";
 write("Enter a number: ");readln(num);
 len:=num.Length;
 for j:=0 to len - 1 do
  i:=0;
  text:=leds[integer(num[j])-48];
  lenled:=text.Length;
  for z:= 0 to lenled - 1 do
   if text[z] # "," then
    concat:= concat + string(text[z]);
   else
    led[i]:=led[i] + concat;
    concat:="";
    i:= i + 1;
   end;
  end;
 end; 
 writeln(led[0]);
 writeln(led[1]);
 writeln(led[2]);
end LED_Numbers.

Anyway...here are the pictures -;)


Greetings,

Blag.
Development Culture.

My first post on Zonnon

As always...I was looking for new and cool programming languages to learn...and then Mark Teichmann came up with something really nice -;) The Zonnon programming language...

So...what's Zonnon? Zonnon is a general-purpose programming language in the Pascal, Modula-2 and Oberon family...and it's run on .NET/Mono...

It's been a really long time since I used Pascal or Delphi...but...just like riding a bicycle...the knowledge came back as soon I started writing some code -;)

Now...the only problem I have with Zonnon...is that's there's almost no documentation...and what's available is in Russian...so...a lot Google helped me up...


Here's the Fibonacci Numbers app...


Fibo.znn
module Fibo;
var num: integer;
var a, b: integer;

procedure fib (var num, a, b : integer): string;
var result: string;
var ab: integer;
begin
 result := "";
 if (a > 0) & (num > 1) then
  num := num - 1;
  ab := a + b;
  result := result + string(ab) + " " + fib(num, ab, a);
 elsif a == 0 then
  num := num - 1;
  ab := a + b;
  result := string(a) + " " + string(b) + " " + string(ab) + " " + fib(num, ab, b);
 end;
 return result;
end fib;

begin
 a := 0;
 b := 1;
 write("Enter a number: ");readln(num);
 writeln(fib(num,a,b));
 writeln("");
end Fibo.

And a couple of pictures...


I need to keep playing and exploring Zonnon...there's a lot of cool things still hiding from me -;)

Greetings,

Blag.
Development Culture.

jueves, 23 de julio de 2015

LED is my new Hello World - Forth Time

Just as you expected...it's time again for my LED Numbers application...this time...using Forth -:)

The code is a little bit longer that I would have expected...but I guess it's either because I'm still a Forth newbie...or because Forth being a stack based programming language has it's own way of dealing with this kind of application...

Here's the source code...enjoy! -;)

LED_Numbers.fth
VARIABLE picky

: COLLECT_PICKY DUP 1- picky ! ;

: NPICK COLLECT_PICKY 2 * 0 ?DO picky @ PICK LOOP ;

: SPLIT BEGIN DUP WHILE 10 /MOD REPEAT DROP DEPTH ;

: First_Line
  CASE
  0 OF SPACE ." _  " ENDOF 1 OF SPACE SPACE ENDOF
  2 OF SPACE ." _  " ENDOF 3 OF ." _  " ENDOF
  4 OF SPACE SPACE SPACE SPACE ENDOF 5 OF SPACE ." _  " ENDOF
  6 OF SPACE ." _  "ENDOF 7 OF ." _   "  ENDOF 
  8 OF SPACE ." _  " ENDOF 9 OF SPACE ." _  " ENDOF
  ENDCASE ;
  
: Second_Line
  CASE
  0 OF ." | | " ENDOF 1 OF ." | " ENDOF
  2 OF SPACE ." _| " ENDOF 3 OF ." _| " ENDOF
  4 OF ." |_| " ENDOF 5 OF ." |_  " ENDOF
  6 OF ." |_  "ENDOF 7 OF SPACE ." |  "  ENDOF 
  8 OF ." |_| " ENDOF 9 OF ." |_| " ENDOF
  ENDCASE ;
  
: Third_Line
  CASE
  0 OF ." |_| " ENDOF 1 OF ." | " ENDOF
  2 OF ." |_  " ENDOF 3 OF ." _| " ENDOF
  4 OF SPACE SPACE ." | " ENDOF 5 OF SPACE ." _| " ENDOF
  6 OF ." |_| "ENDOF 7 OF SPACE ." |  "  ENDOF 
  8 OF ." |_| " ENDOF 9 OF SPACE ." _| " ENDOF
  ENDCASE ;

: LED 
  SPLIT
  NPICK
  DEPTH 3 / 0 ?DO First_Line LOOP CR
  DEPTH 2 / 0 ?DO Second_Line LOOP CR
  DEPTH 0 ?DO Third_Line LOOP ;

And of course...you want to see an image...so here it goes -;)


Hope you like it... -:D

Greetings,

Blag.
Development Culture.

martes, 21 de julio de 2015

My first post on Forth

So...after a very long time...I finally decided to learn Forth...and if I thought I have dealt with difficult programming languages before...I was like Jon Snow...I knew nothing -:(

Forth is a stack based programming language...meaning that you program using a stack with the LIFO functionality...Last In - First Out...

Something like this...you enter 1 2 3 and Forth will output it as 3 2 1...weird, huh?

Of course...I started to read a book...and unlike most other times...I have finish it a long time ago...but with Forth...one book is not just enough...I have been reading and coding like crazy...

The book is Starting Forth by Leo Brodie...


The book itself is really good...it's 166 pages so it's not very long and gives you a nice introduction to the world of Forth...of course...as I said...one book is not enough...and even when this book is really good and highly recommended...Forth is very difficult to grasp but learning it is just amazing -:)

It took me a very long time but finally I was able to come with an example of my already "famous" Fibonacci Numbers...

Fibo.fth
: FIBO 
   1 SWAP 
   0 DUP . 
   ?DO 
      DUP . OVER OVER + ROT DROP 
   LOOP 
   DROP DEPTH 
   DEPTH 2 = IF 2DROP 0 THEN 
;

I told you...Forth is not by any chance and easy language...and actually I wrote the code in just one line...but put it here in different lines to make more clear...

Let's see an image...


I'm sure I going to spend quite more time with Forth...as I feel that's there so much to learn...if you like what you see...learn it too -;) Otherwise...look for something less weird -:)

BTW...I'm using pForth...I used gForth when I first started but I think pForth is more Forth complaint...

Greetings,

Blag.
Development Culture.